Messaging Groups. Assign groups to a user
It is easy to manage Messaging Groups assigned to user and set permissions to send messages and files for each assigned group. For example, you add a new user account on the IM server and need to assign it to a list of groups and manage the sending permissions from one place.
To open the Manage groups for user dialog box, find and select the user account in the Organizational Units structure under the User Management section. Right-click the account and select the "Manage\Assigned groups..." from the pop-up menu.
You can also click the Manage Groups button on the User Account profile page or select the "Account\Manage\Assigned groups..." from the main menu in the Management Console.
 |
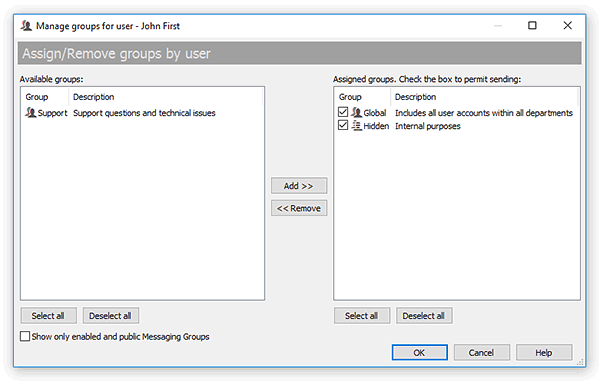
| Manage Messaging Groups for the user |
Use the Add >> and << Remove buttons to move Messaging Groups between available and assigned groups. Select the checkbox in the list of assigned groups to set the permission to send messages and files to the group. You can also double-click on a group to move it between the lists.
Select the "Show only enabled and public Messaging Groups" option to display only enabled (active) and available to users groups in both lists.
